

How To Add Titles In Adobe Premiere Pro
10 of the all-time Adobe Premiere Pro tips
Adobe Premiere Pro tips are understandably sought after right now – as Premier Pro is one of the best video editing applications available, used past professional person editors for everything from YouTube videos to Hollywood blockbusters. But it tin be daunting at outset, as it'south a complex piece of software, and non all of its capabilities are immediately obvious.
If you desire to edit like a pro, read our ten tips for Adobe Premiere Pro, which will aid yous build your conviction, speed up your process, and create ameliorate videos. Of course, if you'due east not got it yet, we advise you to go and download Premier Pro (opens in new tab) now. And, if yous need fifty-fifty more information and inspiration, go check out our list of the all-time video editing software (opens in new tab).
ane. Premiere Pro tips: Use aligning layers

To apply the same effect to multiple clips—e.thousand. applying a consistent colour grade across a scene—you could paste the upshot onto each clip. But this tin crusade actress piece of work; to make an adjustment, yous have to modify the issue on every individual clip. Using aligning layers gets around this.
To add an adjustment layer, in the Project browser, click New Particular > Aligning Layer. It will appear in your bin. Drag it onto the timeline, above all the clips you lot want it to affect, so utilize effects to it. All the clips below it volition exist adjusted by these effects.
2. Premiere Pro tips: Color-lawmaking your clips
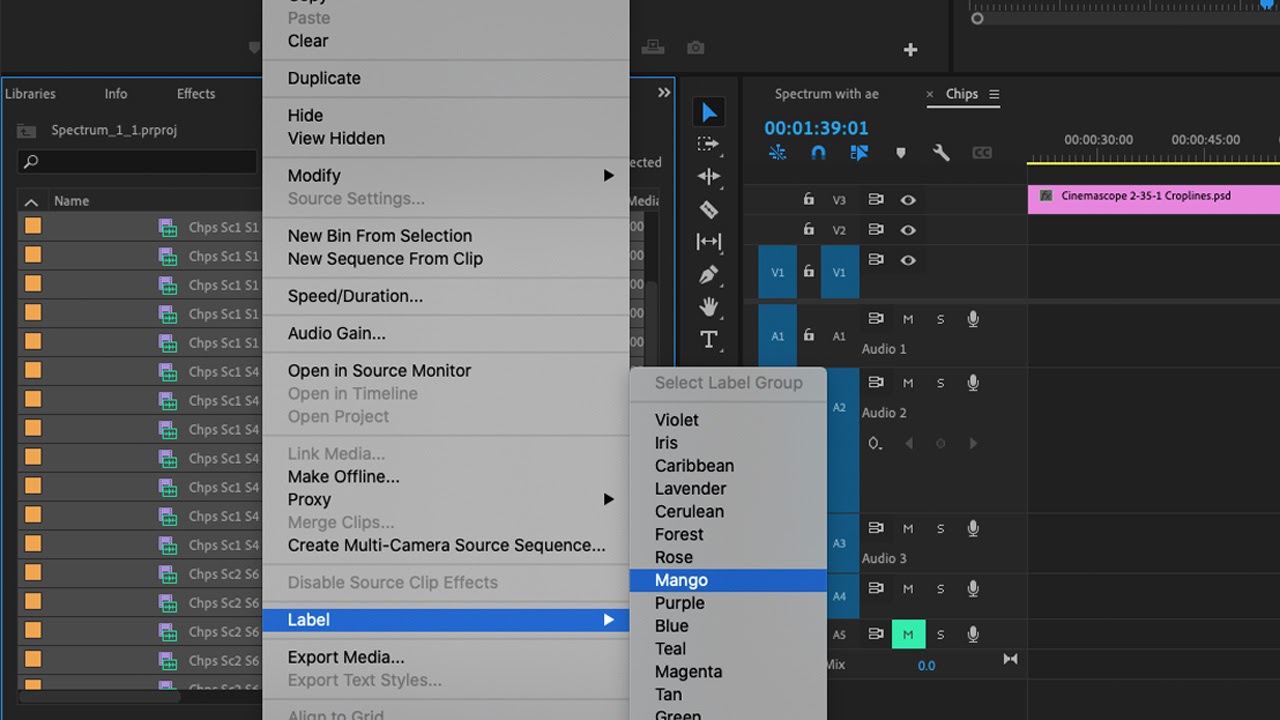
In Premiere's Project browser, clips are sorted into bins, which work in much the same way your computer sorts files into folders. To add an extra level of organisation, you tin colour-code your clips. In your bins, right-click on a clip, or a highlighted grouping of clips, then click Label, and choose a color.
The clips will be marked with this colour in the bins and will appear as this color in your timeline. You tin can give each scene within a projection a unlike colour, or assign colors to types of shots (such equally exteriors and interiors, or wide, medium, and close shots).
3. Premiere Pro tips: Keyframe your furnishings
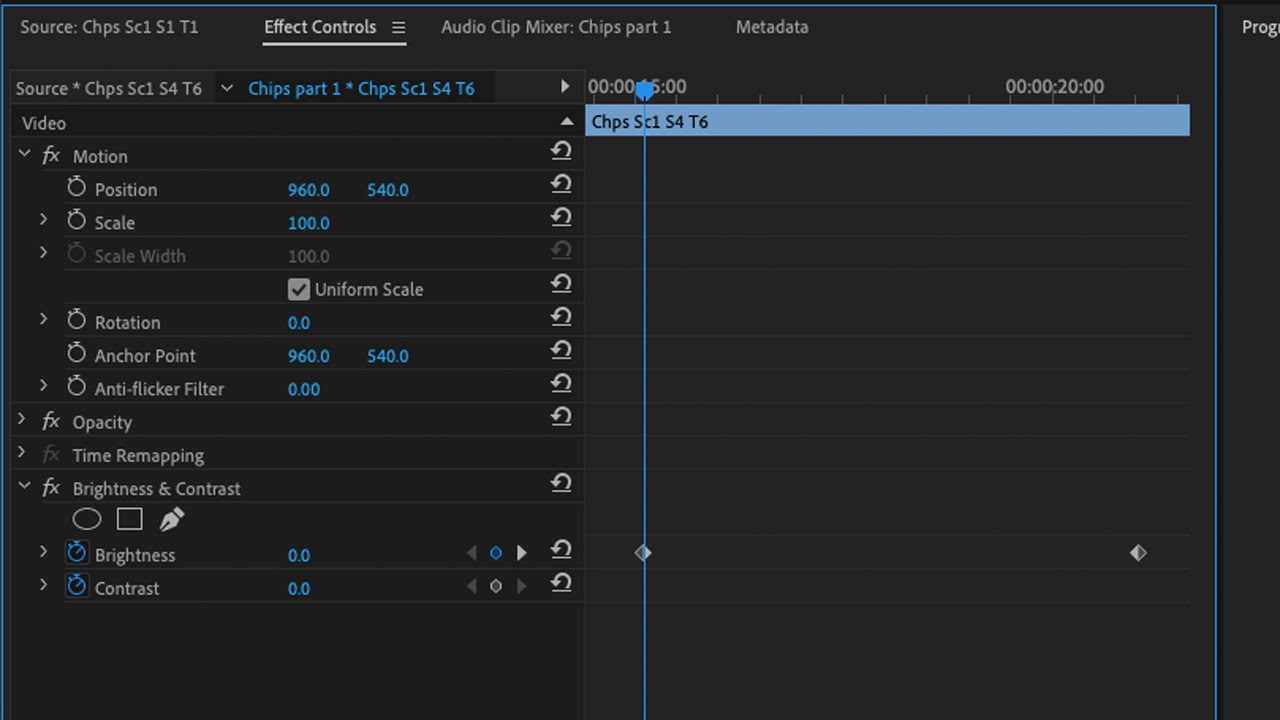
Virtually effects in Premiere tin exist keyframed. This means that, rather than setting one set of effect values, y'all choose specific points in the clip to set the values for, and Premiere automatically creates a gradual alter between these points.
In the Outcome Controls panel, click on the clock symbol next to the effect to toggle animation for that effect. You tin can and so apply the controls on the right of this to add and leap between keyframes. Keyframing gives you precise control over furnishings. For case, you can keyframe a color effect to brand a clip change colour over time, or keyframe a clip'south Movement to zoom in as it progresses.
4. Premiere Pro tips: Hands sync audio
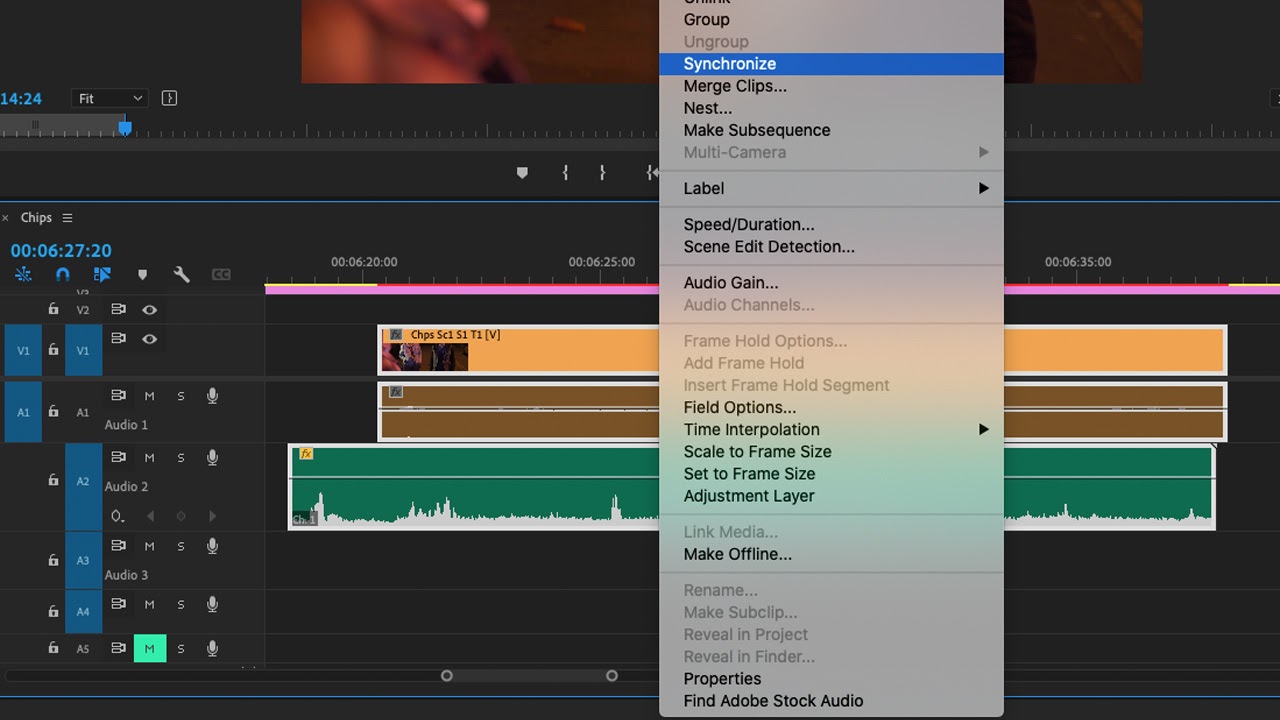
If you desire to synchronize 2 clips—for instance, a video clip with photographic camera audio, and a separately recorded boom mic—you could line them up manually, perhaps matching to a clap. But there'south a quicker, automated technique.
Put both your clips in the timeline, then select both, correct-click, and click Synchronize. In the popular-upward window, select Audio. Premiere will clarify both audio tracks and line them upwards. You can and then unlink and delete your camera audio, merge your video with your preferred audio, and drag that merged clip into the bins to use later.
five. Premiere Pro tips: Dissever long clips
Sometimes when yous have a longer prune, such as an interview or a drone flight, in that location will exist multiple usable shots within it. Information technology can exist easy to lose track of where these best $.25 of the clip are. A way around this is to duplicate the clip within your bins, with different in and out points saved on each indistinguishable.
Open up the clip in the source monitor, so set in and out points effectually a usable section, using the I key for the in betoken and O for the out indicate. And then, drag this into your bins. There volition now be a new version of the clip with these in/out points. Yous can rename it and change the in/out points on the original clip to select another section.
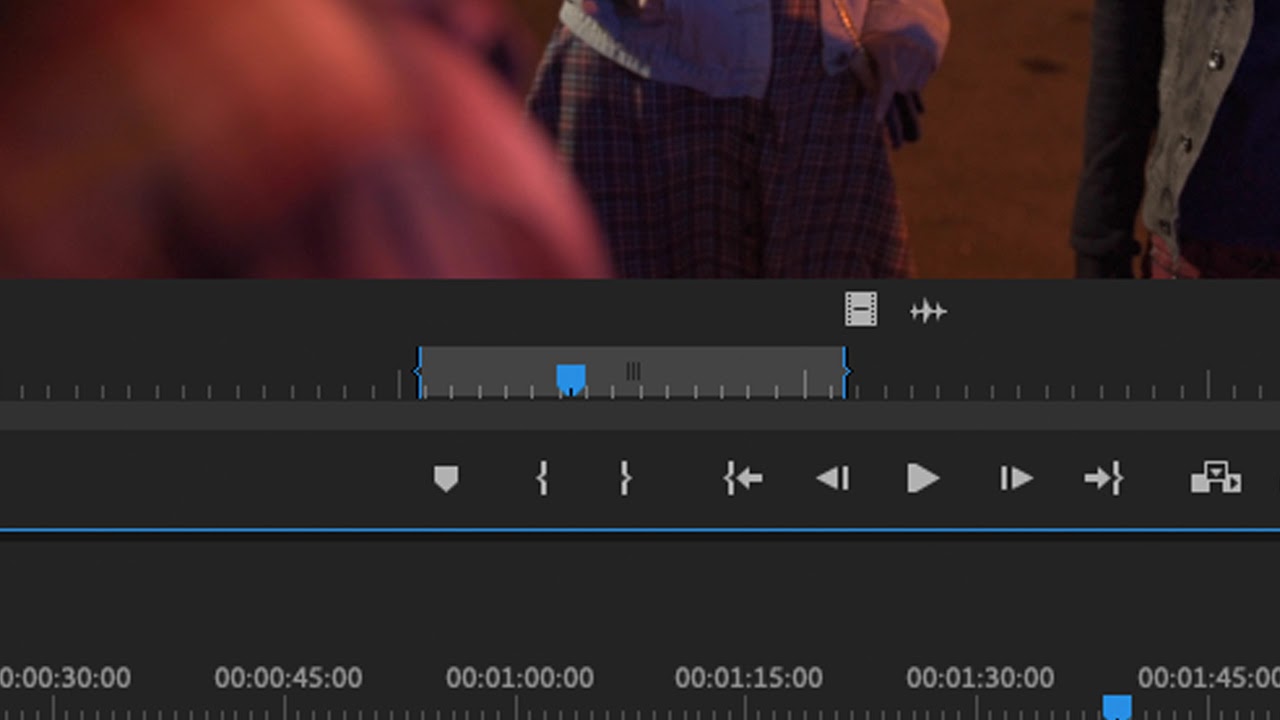
6. Premiere Pro tips: Time remapping
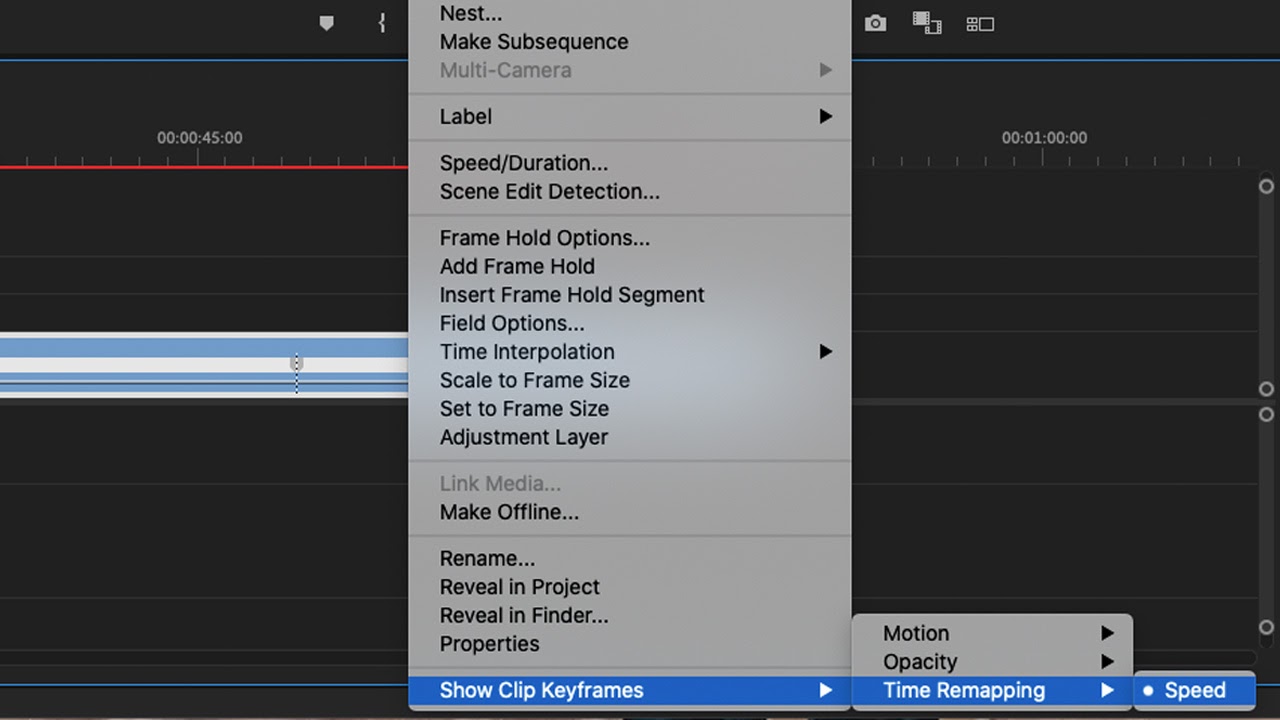
If you want to speed upwardly or deadening downward your clip, you can right-click on it and click Speed/Elapsing. Merely this simply lets yous set one speed for the whole clip. Using time remapping, yous can adjust speed as the prune progresses.
Right-click on the prune and select Evidence Clip Keyframes > Fourth dimension Remapping > Speed. Then, employ the pen tool to add keyframes and the selection tool to raise or lower each keyframe's speed value. By adjusting the clip speed at various points, you lot can create exciting fourth dimension-ramping furnishings.
7. Premiere Pro tips: Edit keyboard shortcuts
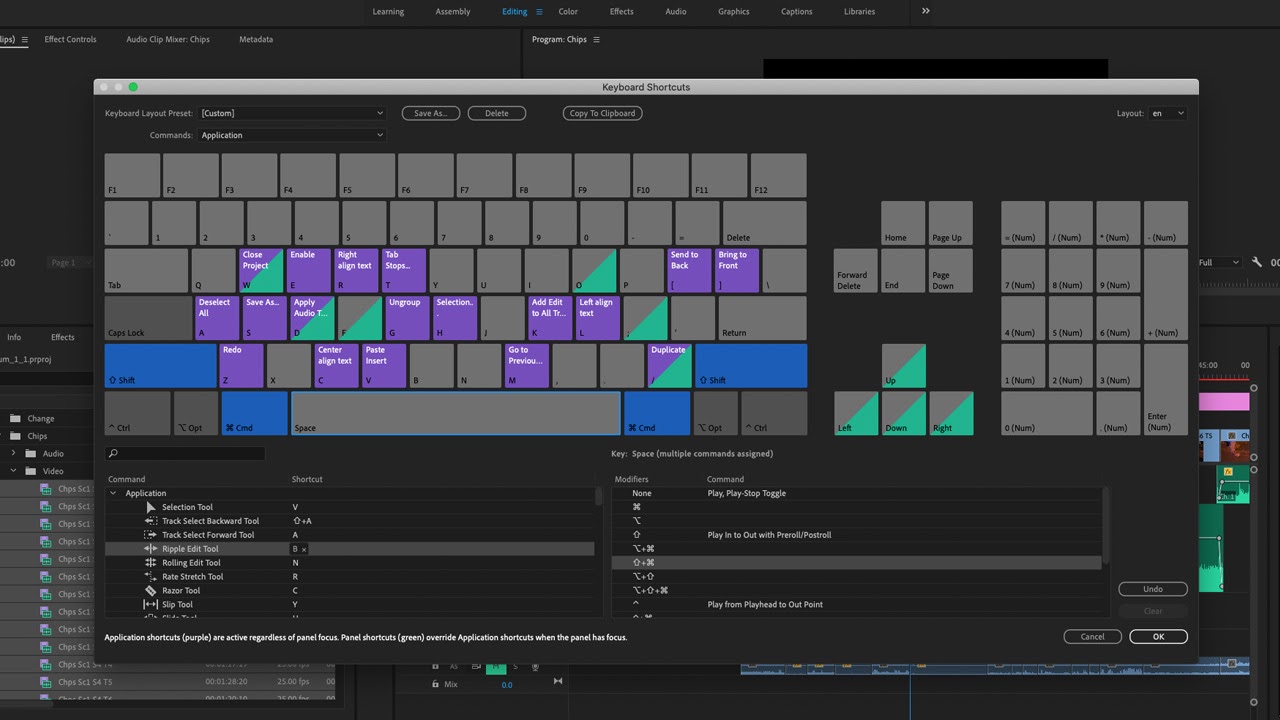
Learning Premiere's keyboard shortcuts enable you to speed up the pace of your work. In fact, a lot of the fastest editors barely touch their mouse. Helpfully, Premiere has a page where yous tin can see all the shortcuts and modify them. On the top bar, click Premiere Pro > Keyboard Shortcuts.
This page shows you a layout of your keyboard, labeled with what each key does. Click on the modifier keys (Shift, Alt, Cmd, etc.) to see what other keys do alongside them. And, if you desire to add together or change shortcuts, drag the function from the commands menu onto the diagram.
8. Premiere Pro tips: Masking
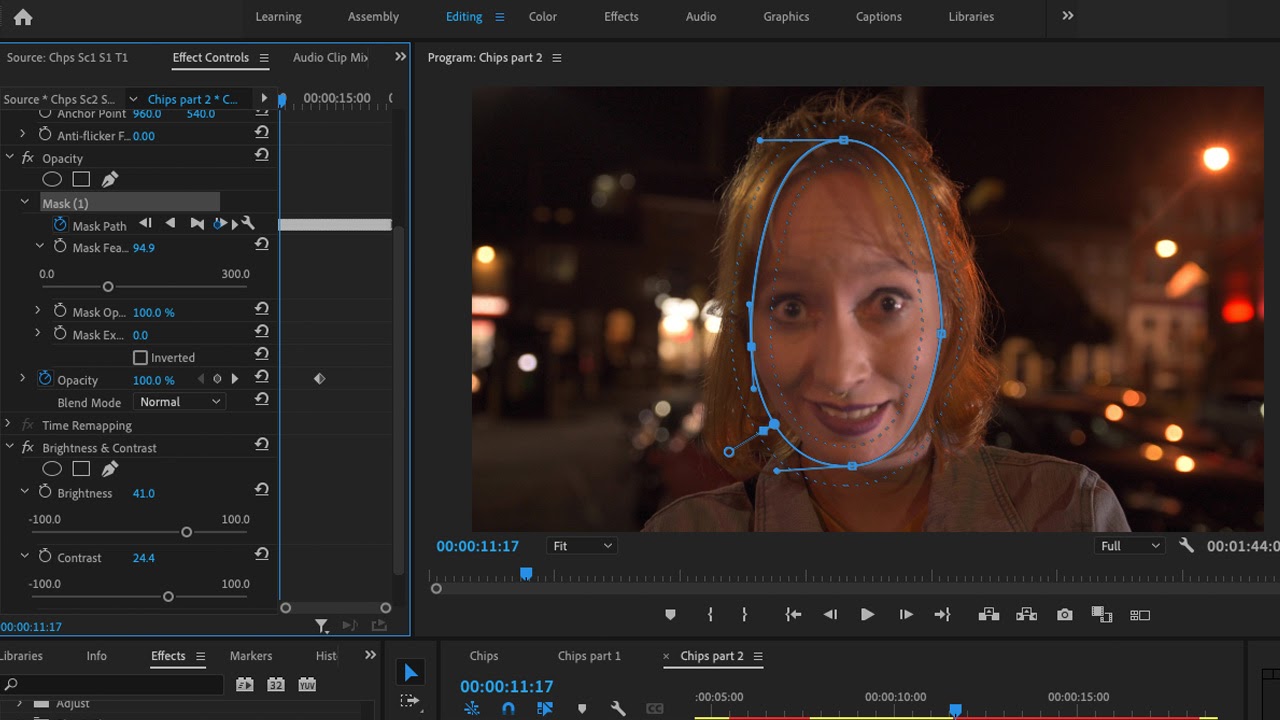
To use effects to a specific expanse within a clip, such equally to brighten a person'southward face, y'all can use masking. First, duplicate your clip onto a layer above. Then, in the Effect Controls console for this duplicate clip, under Opacity, click on the pen tool and use it to describe around the expanse you want to mask.
Now, any effects you lot add to this prune volition only employ to the area within the mask. For moving subjects, Premiere tin can rails the motion and automatically adjust the mask; press the play icon side by side to Mask Path to do this. You can also adjust Mask Plume to give it a softer edge and make furnishings blend in more smoothly.
9. Premiere Pro tips: Speed upwards functioning
Considering video editing is computer-intensive, Premiere Pro tin can lag. There are a few ways to speed upwardly its performance without having to invest in expensive new hardware.
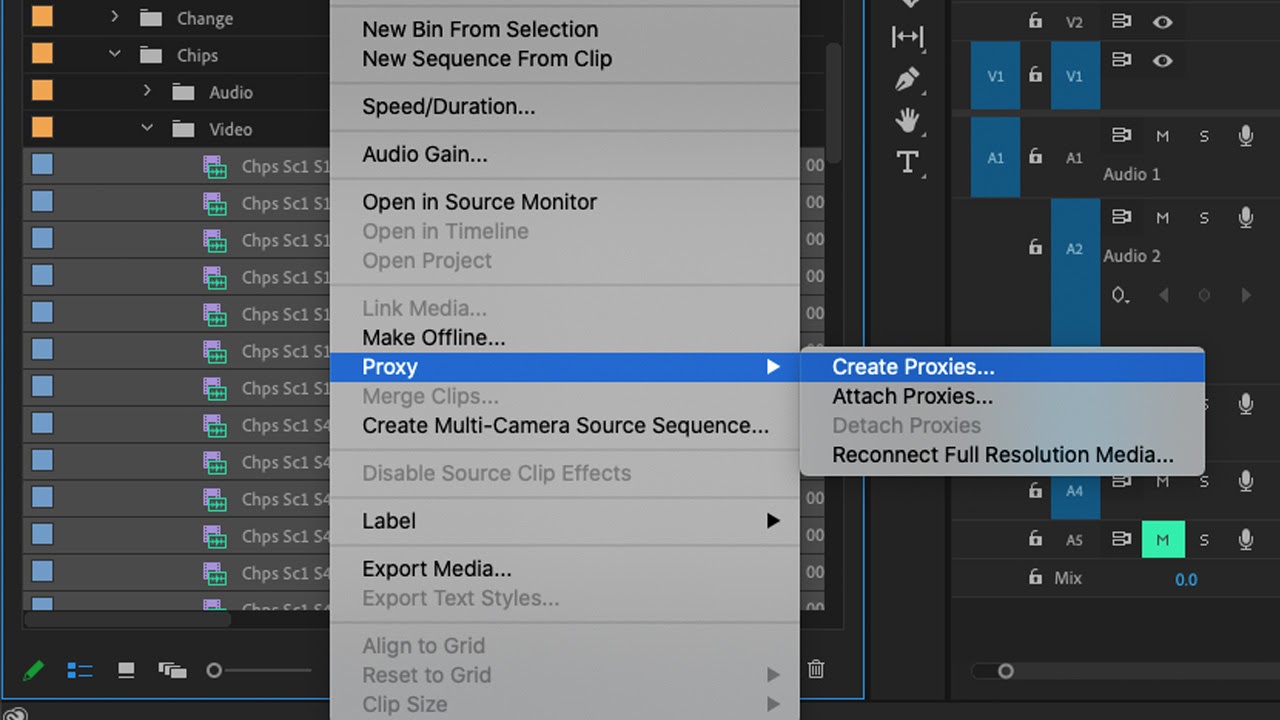
One style is to create proxies—lower-resolution versions of your clips. Highlight your clips in the bin, and select Proxy > Create Proxies. You lot can edit using these proxies, and so switch back to the original files using the Toggle Proxies push (which tin can be added to the Program Monitor toolbar from the card opened when you click the + sign).
Another flim-flam is to change the playback resolution. In the Program Monitor, click on the dropdown box and modify from Full to ½ or ¼. This will reduce the quality of the preview video, but speed up rendering.
You lot can likewise assign Premiere a greater share of your computer's RAM. In the superlative card, click Premiere Pro > Preferences > Memory, then reduce the number next to "RAM reserved for other applications."
10. Premiere Pro tips: Timeline nesting
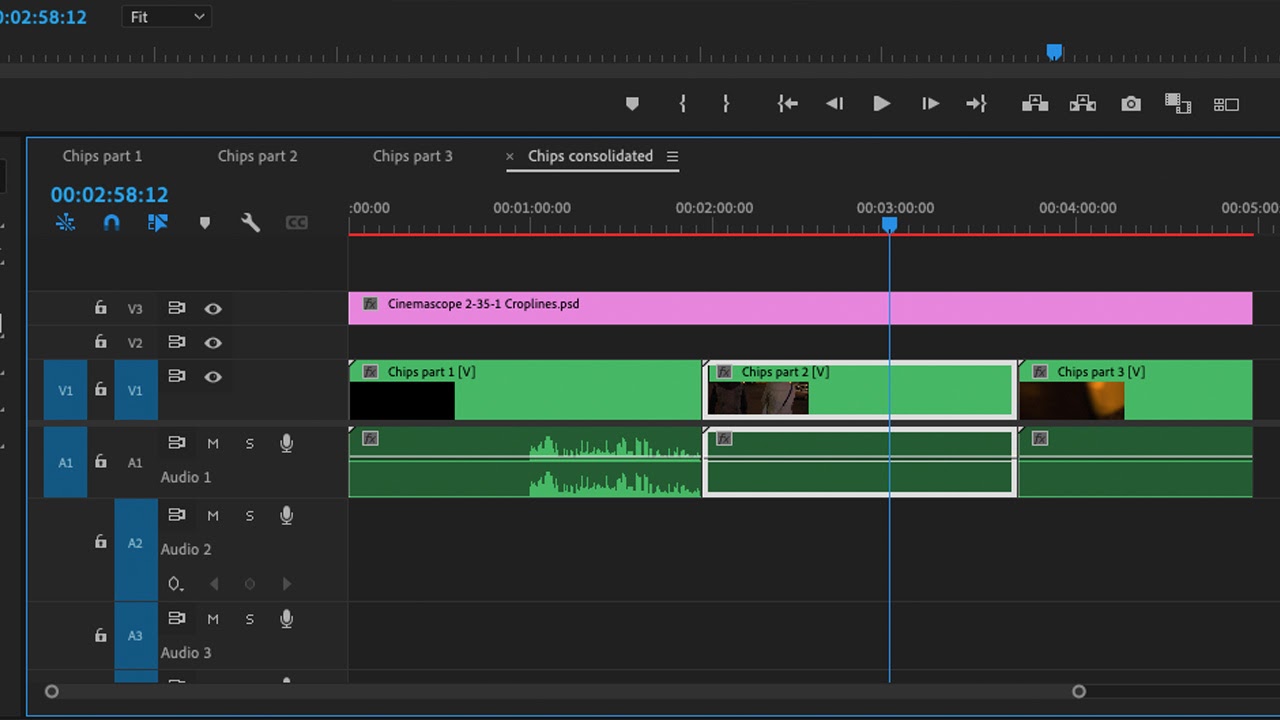
When you lot're working on a large projection, your timeline can become cluttered and difficult to navigate. One trick to get around this is timeline nesting. This involves creating different sections of your project in separate sequences. For case, you lot could have a sequence for each scene.
And then, you tin drag whole sequences from the bin into one principal chief sequence. Each sequence will appear hither like an private clip, but you can still edit the individual sequences by going back into their timelines.
Related articles:
- Adobe Creative Cloud discount: Become your favourite artistic apps
- Download Adobe Illustrator: Get information technology complimentary or subscribe
- Download Premiere Pro: Get Premiere Pro for free

Thank you for reading v articles this month* Join at present for unlimited access
Enjoy your kickoff month for just £1 / $ane / €one
*Read 5 gratuitous articles per calendar month without a subscription
Join now for unlimited access
Try first month for only £i / $1 / €ane
Related articles

How To Add Titles In Adobe Premiere Pro,
Source: https://www.creativebloq.com/features/adobe-premiere-pro-tips
Posted by: changcomboden.blogspot.com
0 Response to "How To Add Titles In Adobe Premiere Pro"
Post a Comment