

How To Add Zebra Printer To Computer
Installing Zebra printer (GK420d)
Follow the next steps to install a Zebra GK420d printer on Windows 10. It is important to follow these steps in the right sequence.
You tin likewise follow these steps when your printer ever worked simply doesn't impress anymore.
Installing Zebra Setup Utilities
Do non yet connect your printer to your computer.
Install the Zebra Setup Utilities application past clicking through all the steps with their standard set-up.
Installing Zebra printer
Now all Zebra Setup Utilities are installed we tin install and confirgurate the Zebra printer.
Open the Zebra Setup Utilities application.
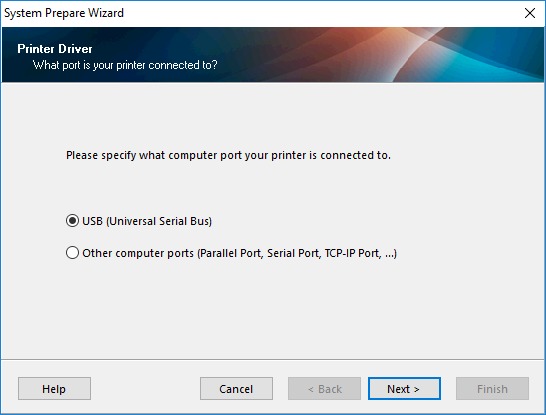
Cull for USB and click 'Side by side'
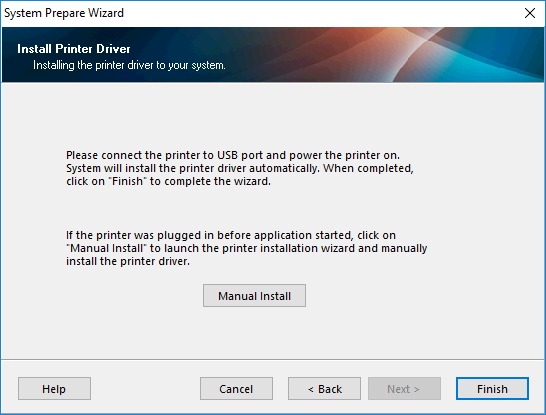
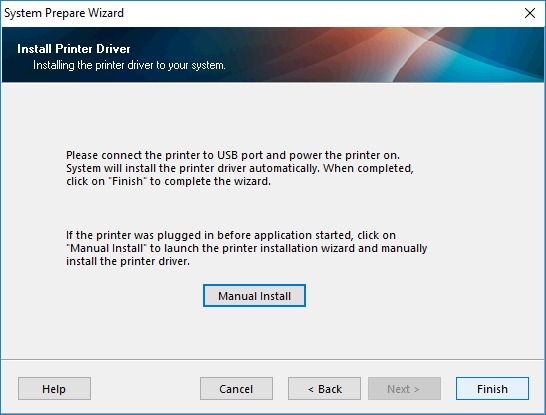
When yous see this screen, connect your Zebra printer to your estimator and launch the printer.
Wait until Windows recognized the printer. This will happen automatically. You can recognize the printer in the overview "Devices and printers" in your configuration screen of Windows.
Click at present on 'Finish' in Zebra Setup Utilities.
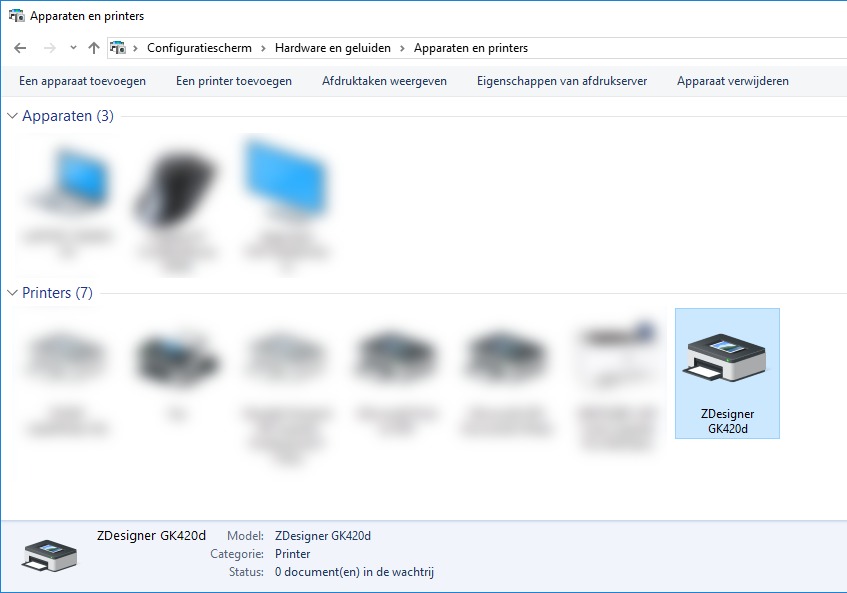
In this screen you tin can at present run into the printer which is automatically installed by Windows. When yous accept multiple Zebra printers installed, y'all volition all notice them here.
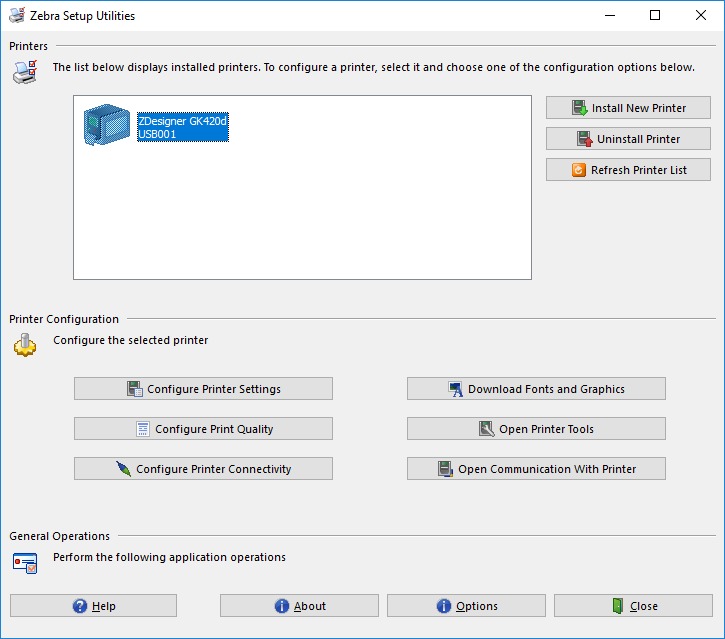
The printer is at present successfully installed.
Configuration of Zebra printer
With these steps y'all configurate the paper sizes and impress quality of the Zebra GK420 for shipment services such as PostNL and DPD. Nosotros assume that yous use A6 labels (4 10 6 inch), which is standard for near shipment services.
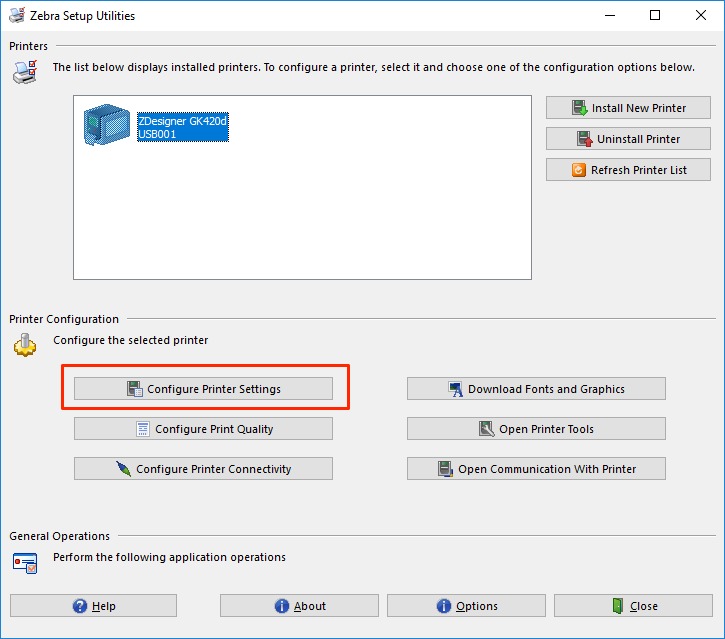
In the Zebra Setup Utilities awarding, select the Zebra printer you desire to configurate.
Click adjacent on Configure Printer Settings
Choose at Units for inch
Choose at Width for four,02
Choose at Pinnacle for v,98
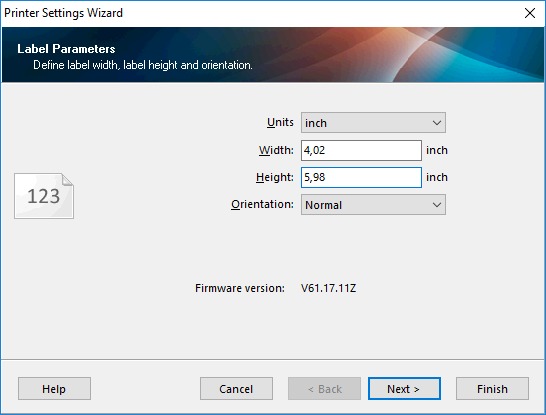
Click on 'Side by side'
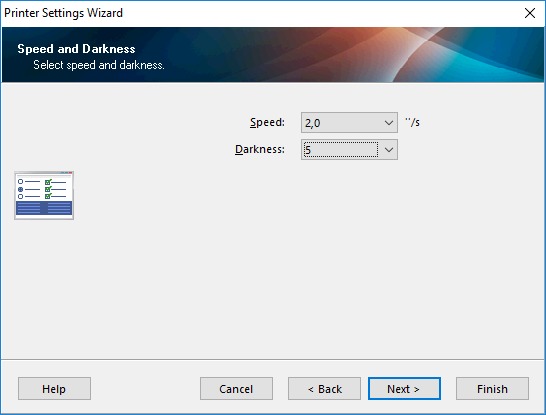
Choose at Speed for 2,0
Cull at Darkness for 5
The speed of 2 sometimes feels slow, but this is important for the best quality so the loss of packages is kept to a minimum.
Click on 'Next'
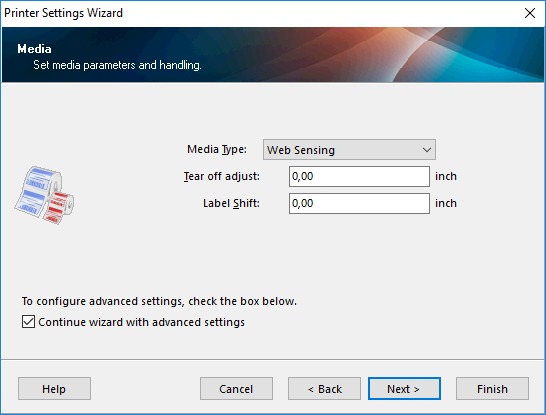
These options are standard correct, simply to exist safe: put in 0 for Web Sensing and both input fields.
Click on 'Cease'
Your printer is now configurated.
Calibrating Zebra printer
Information technology's often required to calibrate the printer after configuration. With this, the printer learns how the paper is put in the printer and where a label starts and finishes.
When afterward setting upward the right paper size the labels are still printed wrong, this often tin be solved past calibrating the printer.
In the Zebra Setup Utilities application, select the Zebra printer you desire to calibrate.
Then click on Open Printer Tools

Click on the tab Action
Select Calibrate media
Click on Transport
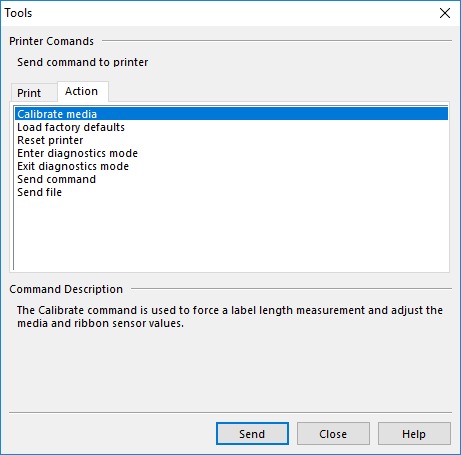
The printer will now print ii to five empty pages. After this the printer is calibrated and you can close the tools.
Examination print
Now the printer is installed, it is ready for utilize.
Download the Picqer exam label and impress it with your Zebra printer
When the label is readable and you can run across all 4 corners, then the configuration has been successful.
Press automatically
At present your printer is configurated, yous can install printers in Picqer.

How To Add Zebra Printer To Computer,
Source: https://picqer.com/en/support/articles/installing-zebra-printer
Posted by: changcomboden.blogspot.com
0 Response to "How To Add Zebra Printer To Computer"
Post a Comment